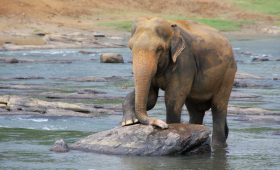
The island of Sri Lanka is gifted with beautiful scenery, ancient history, and friendly people making it a destination of choice for tourists across the world. In order to plan your trip to this tropical wonderland and avoid any problems, one should familiarize oneself with the visa regime and the process of its obtaining. Regardless of whether you have a quick trip in mind or a long vacation to Sri Lanka, this article will explain how to get a visa for this country without depending on your nationality.
Understanding the Sri Lankan Visa Types
First, you need to understand what kind of visa you are going to apply for before you start your application. Sri Lanka offers several types of visas, depending on the purpose of your visit:
- Visit Visa
- Tourist Visa (ETA): For short-term visits for tourism, holidays, or sightseeing.
- Business Visa: For travelers conducting business meetings, conferences, or negotiations.
- Residence Visa: For those planning to stay in Sri Lanka for an extended period due to employment, study, or other reasons.
- Transit Visa: For travelers transiting through Sri Lanka to another destination.
Applying for an Electronic Travel Authorization (ETA) Online
In the case of most travelers, the simplest method of getting a visa is through the ETA system – Electronic Travel Authorization. This online visa is for most countries and allows the holder to stay up to 30 days, which can be further extended.
Steps to Apply for an ETA:
- Visit the Official ETA Website: Visit the official website of the Sri Lankan government’s ETA website at http://www. eta. gov. lk.
- Fill Out the Application Form: The information that is required in such situations includes personal details, passport details and travel schedule.
- Select Your Visa Type: Select the type of visa (Tourist, Business or Transit).
- Pay the Visa Fee: Fee for the visa also depends on the country of the applicant and the type of visa to be issued. The payment can be made with a credit or a debit card.
- Submit the Application: Upon filling the form and making the payment, complete your application.
- Receive Your ETA: After that, you will get your ETA through the email and it usually takes 24-48 hours after the approval. Take a hard copy with you with a view to producing it upon arrival in Sri Lanka.
Visa on Arrival
Some of the nationalities are allowed to get the Visa on Arrival service in Sri Lanka. However, it is advisable that one applies for an ETA prior to arrival to the airport in order to avoid complications. The VoA is issued at the Bandaranaike International Airport (BIA) in Colombo or at any other port of entry and the procedure is the same as that of the ETA online application.
Applying for a Visa at a Sri Lankan Embassy or Consulate
If you do not qualify for an ETA or if you would like to apply for a visa in person then you can get a visa by going to the nearest Sri Lankan embassy or consulate in your country.
Steps to Apply at an Embassy or Consulate:
- Find the Nearest Embassy or Consulate: Locate the Sri Lankan diplomatic mission in your country.
- Gather Required Documents: Typically, you will need your passport, completed visa application form, passport-sized photographs, and proof of travel arrangements.
- Submit the Application: Visit the embassy or consulate to submit your application along with the necessary documents and visa fee.
- Wait for Processing: Processing times vary, so it’s advisable to apply well in advance of your travel date.
- Collect Your Visa: Once your visa is approved, you can collect it from the embassy or consulate.
Visa Extensions
If you want to stay further in the country for more than 30 days, you can apply for a visa extension at the Department of Immigration and Emigration. Generally, they extend the visa for 60 days following your arrival with further extension available for a maximum of 6 months. I think you should travel to Sri Lanka now.
Steps for Visa Extension:
- Visit the Department of Immigration and Emigration: Go to the office in Colombo.
- Submit Your Request: Provide your passport, visa, and a completed application form for an extension.
- Pay the Extension Fee: The fee varies depending on the length of the extension.
- Receive Your Extended Visa: Once approved, your visa will be extended, allowing you to continue enjoying your time in Sri Lanka.
Important Tips for Visa Applicants
Check Eligibility: Before applying, ensure that your nationality is eligible for the visa type you need.
Apply Early: Start the visa application process well before your planned travel date to avoid any last-minute issues.
Carry Supporting Documents: While most visas are granted without requiring additional documents, it’s wise to carry proof of accommodation, return tickets, and sufficient funds.
Be Aware of Visa-Free Countries: Some countries have visa-free agreements with Sri Lanka, allowing their citizens to enter without a visa for short stays. Always check the latest visa policies.
Conclusion
Securing a visa to Sri Lanka is a straightforward process, whether you’re applying online, on arrival, or at an embassy. By following the steps outlined in this guide, you can ensure a smooth and stress-free experience, allowing you to focus on enjoying all that Sri Lanka has to offer. Whether you’re exploring ancient temples, relaxing on pristine beaches, or immersing yourself in the vibrant local culture, Sri Lanka awaits with open arms. Safe travels!


